- Comics
-
Green Blog
Our Top Bloggers
Blogs By Topics


Tie Dye For (Part 1)

.jpg)
You liked my faded jeans blog so well that here is another great idea for the hippy-hip kids who want a thrifty way of saving that stained t-shirt and giving it a whole new look by tie-dying it.
1) Pick a Shirt. An old white cotton shirt is best (100% Cotton), the perfect way to recover that nice white shirt with the stain that won’t come out. You won’t notice it when we are done! You can use 50% polyester and 50% cotton blend but you need to know that dyes only bond well with natural fabrics like cotton, rayon, or silk.
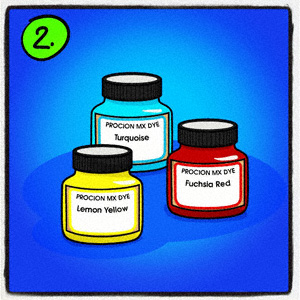
2) Buy Your Procion Dye. You only need to use 3 colours: Lemon yellow, Fuchsia Red and Turquoise because with these colours you can get any colour of the rainbow. I had heard that Procion brand dyes work the best and when I looked into it I saw that Procion is just a brand of special cold reactive dyes that many companies make because the patent expired on it a long time ago - so it’s not hard to find. I found it at my local artist supply store.
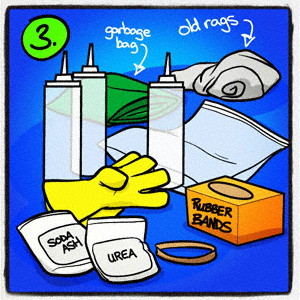
3) Gather up some tools of the trade. You will need a few squeeze bottles for each of the colours you will be using on your shirt (old mustard bottles work great), rubber gloves so you won’t stain your hands and plenty of rubber bands (my Mom saves all the elastics from vegetables) and a large zippered plastic bag to store your shirt in while its absorbing the dye. Also you will need soda ash and urea and don’t forget some plastic to put down over your working space (cut open garbage bags are cheap and work good) and plenty of old rags to mop up the spills! You can get the soda ash at pool and spa stores. You can also buy dye kits and everything you need from a dye store and they are great about giving advice.
4) Prepare the canvas. You should probably put the gloves on at this point because if you have a cut, this solution will sting! It is very important that you pre-soak the shirt in a solution of 4 litres of WARM water and 1 cup of soda ash for 10 to 15 minutes. This will prepare the fabric of shirt to absorb the dye. If you are using a new shirt you have to wash it a couple of times before this step to get rid of the newness. Brand new fabric has something in it that will prevent the dye from bonding and you may get a streaky effect. Make sure the water is about the same temperature as a babies bath and Gramma taught me to add a couple of tablespoons of normal table salt to the mix because that helps too.
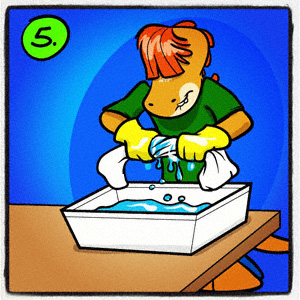
5) After 10 minutes has gone by, spin or ring out your shirt as best as you can. The better spun out it is, the more that the dye will soak in. Follow all of these pre-soaking tips otherwise your dyes will not bond with the fabric as well as they possibly could.
I’m going leave this blog here for now because I’m dying (get it?) to get a couple of shirts tied tonight and Teresa is on her way over to get a few of her own done so you will have to wait for part 2 of this blog so I can show you how to make the shirt pie. Plus, Teresa says she has a couple of new tricks to show me and I want to learn them so I can teach them to you!
Blog Category:
RRR
Blog Group:
DIY