- Comics
-
Green Blog
Our Top Bloggers
Blogs By Topics


Give Clothes New Life By Dyeing
My best girlfriend Teresa has being bugging me to write something about dying clothes so I’m finally sitting down to do it after the weekend now that I know what it is all about. She and I spent the weekend adding colour to our wardrobes and I was really impressed by how easy it is to do and how great it looks to have fresh dyed clothes in the exact colour you want.
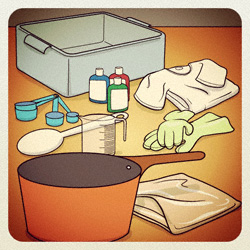
Here is what you need for any basic dye job:
-Liquid dyes in your favorite colour.
-Cotton clothes that you want to renew or change.
-Measuring cups and spoons
-Spoon to stir or mix the dye
-Large plastic container for dyeing
-Large pot for heating water
-Rubber gloves
-Plastic table cover (to protect Mom’s table from the dye you are using.)
Step 1: The first thing you should do is prewash the clothes you want to dye to remove any finishes which may interfere with the dye absorbing into the clothes.
Step 2: Cover your work area with the plastic cover. Wear plastic gloves.
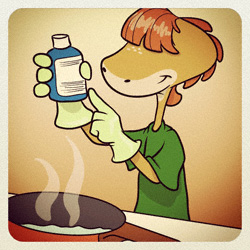
Step 3: Heat the pot of water.
Step 4: Follow the instructions for mixing the dye with the hot water. The weight and size of the clothes you are dying determine how much dye and water should be used.
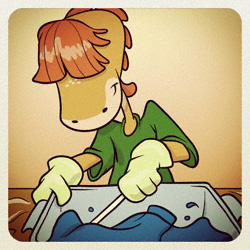
Step 5: Wet the clothes you want to dye in warm water and wring out the excess water.
Step 6: Immerse the clothes you want to die in the large plastic container with the hot water and dye solution and stir continuously for at least 10 minutes or until your clothes are the shade you are looking for. Remember the colour will appear lighter when it is dry.
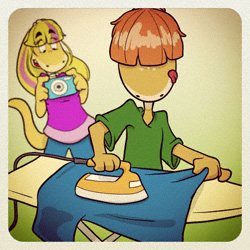
Step 7: Remove the clothes and wring out the excess dye. Rinse in cool water until the water runs clear then wash the garment in warm water with mild detergent then rinse it again, dry it, and iron it to set the colour.
Once you get comfortable with the whole easy dying process there are many other tricks that you can do to ad style and originality to you wardrobe. You can experiment with resist which is a liquid that prevents the dye from changing the colour of the fabric wherever you put it on the clothes. This allows you to draw designs on the clothes and when you dye them the dye doesn’t stick to where you have drawn with the resist. If you are going to draw on your clothes with resist, its important to remember to place a plastic sheet between the fabric so what you draw on the front doesn’t transfer to the back and visa versa. Also there is tie dying which Teresa says she will show me how to do next weekend.
All in all I was really impressed with the results and happy to find a way to get more use out of my clothes. I’m already very careful with my clothes and keep them looking as new as possible but after a certain amount of washing they become faded, no matter how careful you are. This technique allows you to keep your clothes looking bright and new and gives you more options to create your own style and to be original.
Blog Category:
RRR
Environmental Choices
Blog Group:
DIY