- Comics
-
Green Blog
Our Top Bloggers
Blogs By Topics


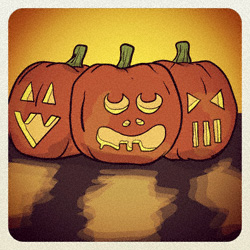
Carving Pumpkins For Halloween
I really enjoy carving pumpkins at Halloween, and it’s become quite an art form for me. It’s a tradition in our house to have a pumpkin carving day, usually the Saturday before halloween. I try to make one really elaborate pumpkin for myself each year, and help the kids make simpler ones.
Pumpkin shopping is fun and can be done weeks in advance. Finding that perfect pumpkin for each person is sometimes a challenge, especially if you leave it to the last minute, but if all you can find is odd-shaped pumpkins, that’s the time to use your imagination for the carving.


After everyone has chosen their pumpkin, I like them to custom make a design for it. If you are a really good drawer, you can just use a felt pen and draw your face, but usually we practice with a piece of paper and make a pattern. There are lots of pumpkin patterns on the internet, and even free ones that you can download. Or, you can make your own pattern and practice drawing it out on a piece of paper until you have what you want.
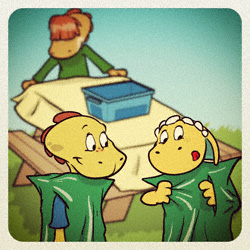
Pumpkin carving can be messy, so you really need to be prepared. My preference is to do it outside on the deck where I can just hose everything off after it’s all done. The first thing I do is make everyone put on a garbage or recycle bag with a hole in the top and on the sides for your arms to come out. This keeps everyone sort of clean.
Then I cover our picnic table with a big plastic tablecloth, or you can use newspapers too if you want. I also have a plastic tub that I put in the middle of the table to hold all the pumpkin scraps as they come off.
I have an actual pumpkin carving kit which makes it easier to do some of the harder patterns that I work on now, but the kids all just use ordinary steak knives with a serrated end. They are sturdy knives, but not so hard to handle. They can use a sawing action to cut through the pumpkins with the ends of the knives.

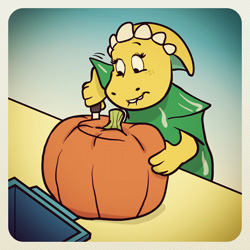
The first thing to do is to cut your lid for your pumpkin so that you can get all the stuff out of the inside. The hole has to be big enough to get your hand into. In order to make sure that your lid will go back on your pumpkin, it’s best to cut your hole at an angle towards the middle so that the lid will be supported by the inner part of the pumpkin. (If you do cut the hole too straight so that your lid just falls through, then cut as much of the flesh off your lid as you can, and then you can push pins around the inner hole to act as a support for the lid once you’re finished.)
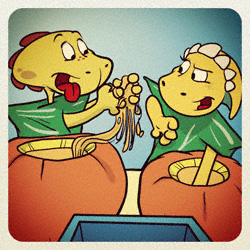
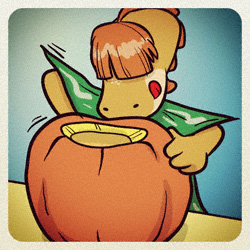
We scoop out all the guts out of the pumpkin and put it in the tub, keeping the seeds off to one side. (We save them to roast in the oven later.) Make sure the pumpkin is really clean inside. We use a spoon to scrap all the slimy stuff out and make sure that there is a flat spot on the bottom of the pumpkin for the candle or light to sit on.
After everyone has finished thoroughly cleaning out their pumpkins, it’s a good idea to wipe up the table and have everyone wash their hands and dry them so that you are working with a clean area again. Pumpkin guts are slippery and make it hard to hold tightly to a knife.
Now it’s time to start on your masterpiece. There is two ways of getting the finished pattern on to your pumpkin. My first choice is tracing paper. You tape the pattern to the pumpkin with the tracing paper face down on to the pumpkin. Make sure the pattern is straight and where you want it. Then you take a pen and trace your pattern making sure that you are pressing hard enough for the tracing paper to leave a dark line on the pumpkin. The second way to get the pattern on to your pumpkin is to tape your pattern on, and then use a push pin to go around all the lines. The pushpin makes tiny holes that you can follow after you take off the pattern.
After your picture is outlined on the pumpkin, start cutting. It’s best to work slowly and carefully so that you do a good job of cutting out all the pieces. They go into the tub. After your pattern has been cut out, put light inside and put the lid back on.
When we’ve cleaned everything up, the guts go into the compost and we wash the seeds separately and bake them in the oven for an hour or until just a little golden brown on a cookie sheet with a little olive oil and salt. Yummy!
Blog Group:
Halloween