- Comics
-
Green Blog
Our Top Bloggers
Blogs By Topics


Unique Christmas Family Tree
It’s really hard to think of something to give to my Grandparents for presents because they always say they don’t need anything anymore. We still try to think of small things that they might use. Nothing really big or expensive, but just so they get something from us kids.
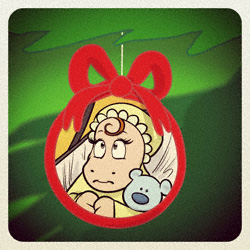
Last year I had a really good idea to make something for my Grandparents that I KNOW they will love, and I’ve spent this year collecting the stuff I need to make it. It’s tree ornaments, one for every person in our family, that has their baby picture and their name and birth dates. It’s kind of from all of us, even though it was my idea. Everyone helped me gather the stuff I needed.


The first thing I did was started collecting the tops from frozen juice cans. They are round and smooth and a shiny silvery colour - plus they don’t have sharp edges.
Then I asked all my aunts and uncles to email me baby pictures with a good head shot for everyone in their family, including themselves. I specified that I wanted pictures of each person when they were between 1 and 2 years old.


After I got each picture, I resized them so that the heads were about 4 cm X 4 cm. Then I cropped each picture to be about 7 cm X 7 cm. Once I had a cropped square picture, I put the picture on a document and centred a 6.5 cm circle (which is exactly how big the inside border of the lid is) around each head. By arranging the pictures tightly, I can get at least 9 heads on a sheet of paper. Then I printed them off on piece of photographic paper. When I was sure the ink was dry, I used a spray-on varnish to lightly spray the paper to keep the pictures from fading with age. I put on at least 2 coats, but the first one has to be very, very light so that the ink doesn’t get wet enough to start to run. Then wait for it to dry before spraying again.


While you are waiting for the varnish to dry, take a paint pen and carefully letter on each lid (on the side that has no date code) the person’s name and their date of birth. (Do this before you glue the picture to the lid so if you aren’t happy with your printing job you can just do another lid.)
After your varnished piece of paper with the pictures is completely dry, cut out the circles carefully of each head. Now, looking at the lid on the side where you printed the name and birthday, make a mark on the top edge of the lid at the centre. Now when you flip the lid over, you can centre your picture to the same mark. Glue the picture to the inside rim of the lid on the side of the lid that has the date code.

Finally, take some thin ribbon and starting at the mark on the top of your lid, leave a tail of ribbon of about 15 cm and with a glue gun start gluing the ribbon all around the edge of the lid. When you get back to your mark at the top after gluing the ribbon all around the edge of the the lid, tie a knot and a little bow, then trim the edges of your tails. You should be able to slip a ornament hook under the bow.
If you don’t want to put ribbon around each ornament, you can also just punch a hole at the very top of the lid with a hammer and nail and then put in a metal ring to hook your ornament hook to or thread a piece of ribbon through and tie it so it’s long enough to use as a hanger itself.
I made one for every member of our family and for all my aunts and uncles and their families too. I saved some extra juice tin lids for when new kids come along. Once of my Aunts even scanned the baby pictures of my Grandparents from photos she had, so I have a complete set of baby pictures for everyone. I know my Grandma especially is going to love this idea, and so is everyone else when they see the “family tree”. Best of all, after Christmas the ornaments will be packed away and it will be cool to bring them out again each Christmas. I’m really excited about this gift!
Blog Group:
Christmas